It may look easy, but there’s a lot more to photographing food than you might imagine. Getting the perfect shot of some enticing-looking food takes good timing, practice, patience, and skill. You’ll need to consider angles, lighting, equipment, and props. Then, of course, there’s getting the food itself to look just right as well.
Whether you’re looking to take some photos for a blog, wow your friends over social media, or build a professional portfolio, these five tips will help you on your way to getting the perfect food photos.
1. Use Natural Light
As a general rule, artificial light is off-limits for food photography. Front on-lights in particular, such as a camera’s flash, will flatten your dish’s appearance and remove any natural and delicate shadows. Natural light will always be your best bet unless you happen to have specialist studio lighting on hand.
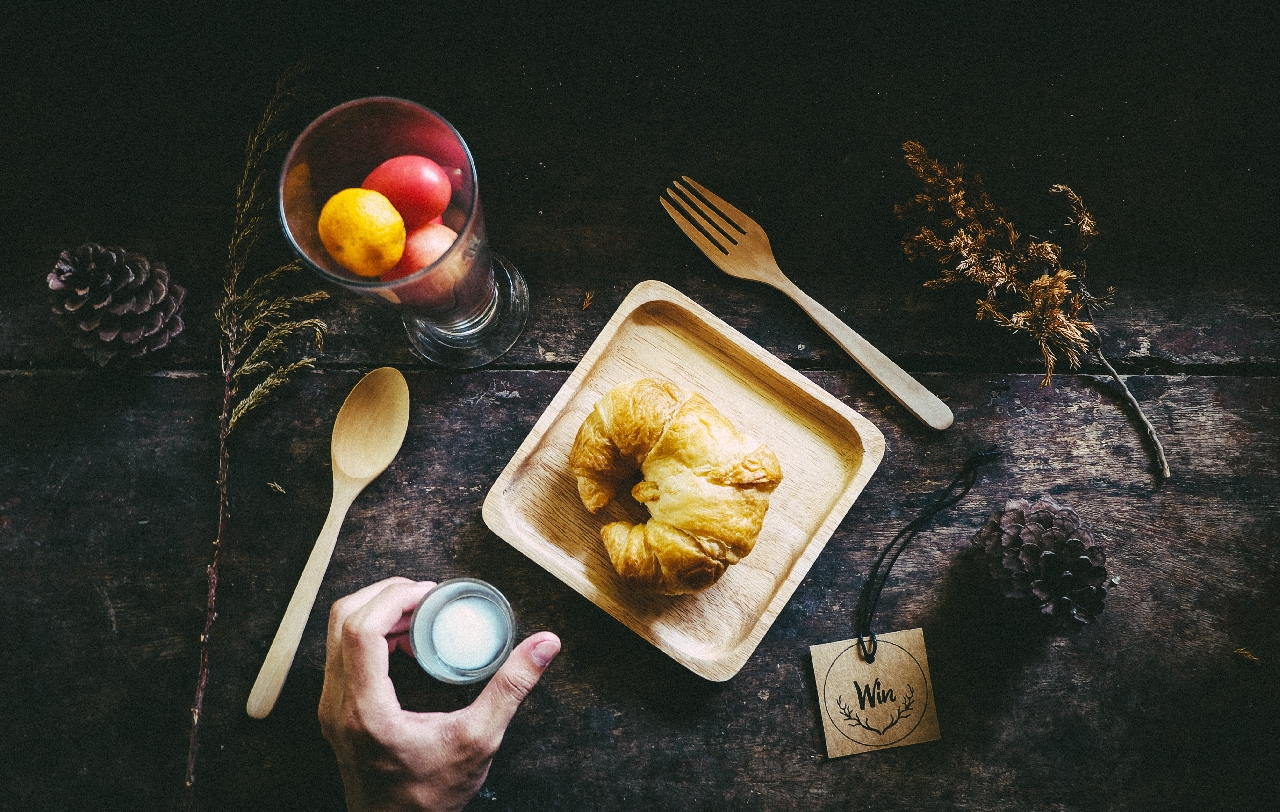
2. Choose Suitable Props
When done right, props can contribute to the mood and feel of your photo on a viewer’s subconscious level. However, objects and decor can also distract the viewer and ruin your aesthetic when misused.
When choosing props, think about the kind of aesthetic that suits the food in question. For example, you might opt for some rustic décor when photographing a traditional dish. Likewise, you might opt for colorful party hats and balloons if you plan to take pictures of a children’s birthday cake.
But, of course, don’t just think about the things you’re placing around the food, either. The surface and crockery your food sits on are equally important in creating the overall vibe of your final picture.
There are no hard and fast rules when it comes to props. However, you’ll generally want to avoid too much clutter or anything that takes attention away from the food itself.
3. Don’t Let The Food Sit
Food photography is all about timing. The longer your dish hangs around on the counter, the more tired and un-appetizing it will begin to look. Such is especially true for meat dishes and anything involving herbs. As a result, you’ll want to have everything set up as much as possible before the food is ready, and you’ll need to work fast once it is.
That said, if things start to look a little withered, dry or lifeless, then a quick spritz of water or a little oil might give you a little more time. Just be careful of overdoing either of these options, or you’ll end up with food that looks soggy or greasy.
4. Use The Right Kit
You don’t need an incredible camera or studio lighting equipment to get nice-looking food photographs. However, you will need at least an entry-level DSLR camera which thankfully should put you back too much.
It’s also worth remembering that many of today’s latest smartphones have surprisingly high-quality cameras, so it’s worth experimenting with what you’ve got first. Otherwise, some decent photo editing software will go a long way too.
A decent lens is a great bonus, and light modifiers can take your photos to the next level. Still, if you are just getting started, there’s no need to splash out on these things just yet, as you’ll do fine without them.
5. Embrace Happy Accidents
Some crumbs fall off a slice of cake or pie? Before you set about cleaning it away, why not look and see how it looks through your camera lens? You might be surprised by the results. A bit of mess can add a rustic homemade charm to a photo, which might be preferable depending on your audience.
Food doesn’t tend to behave itself, and too much rigid perfectionism can make your pictures look sterile. So, now and then, it pays off to embrace the accidents